
How to send an email campaign
Write one email, choose who receives it, and check the result after sending.
A campaign is one email you send once to the people or addresses you choose. For example, a shop can tell its customers about new products arriving this weekend. This guide takes you from a new campaign to checking its delivery history.
Before you start
Campaigns are available on Growth, Scale, and Enterprise. You need an editor or administrator role to make changes. If Emails asks you to finish setup, complete that step first.
Have your message, the page you want customers to visit, and your recipient selection ready. Only include people you have permission to email. An existing unsubscribe or delivery restriction still applies.
1. Create a campaign
Choose the correct site in your workspace. Under Customers, open Emails. Select Campaigns, then + New campaign.
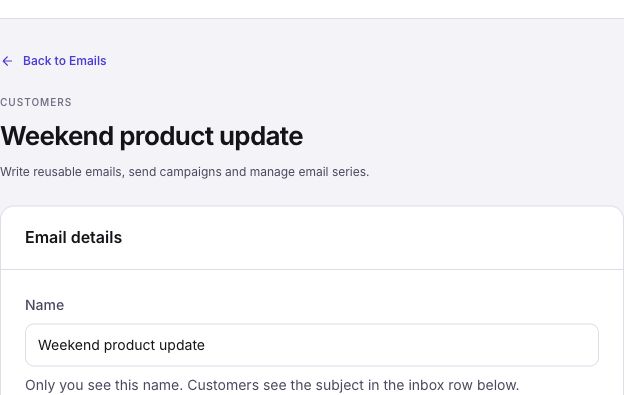
In Email details, enter a useful Name, such as “Weekend product update.” Only your team sees this name. Customers see the subject instead.
2. Write the subject, preview text, and email
Under Email content, fill in both required inbox fields:
- Subject: “New products this weekend”
- Preview text: “See the latest arrivals in our shop.”
The preview text gives people more detail before they open the message. Make it useful rather than repeating the subject.
Click text in the email preview to edit it. Hover between content blocks and use the plus control to add a paragraph, heading, button, list, divider, or image. Hover a block to see its formatting and removal controls.
Keep this example short: explain what has arrived, add one useful photo, and add a button linking to the right shop or product page. Check that the link opens the intended public page. If you use customer placeholders, resolve any missing information the review flags before sending.
3. Choose recipients
In Who will receive this?, choose the option that fits this campaign:
- Individual people: select + Choose people. Search for a name or email, use the sort and filters, and check the people you want. Confirm the selection in the picker and check its count back on the campaign.
- A saved group: use Audience to choose the relevant group. Review any available stage selection so you target the intended people.
- Individual email addresses: choose Email addresses and enter one address per line. Correct any invalid addresses.
For the weekend update, choose the customer group that should receive shop news. Saving a group choice keeps that choice; it does not guarantee that everyone in the group passes the delivery checks. Review the current recipients before the final send.
4. Check the sender and save
Review the Sender card. Check the From name, Reply-to, and Business address. Use Edit sender settings if they need changing, then return to the campaign.
Select Save campaign after editing the email or its recipients. Saving keeps the campaign content and recipient selection so you can return later. Saving does not send the email.
To confirm the save, return to Campaigns, reopen this campaign, and check its content and audience. If you leave with unsaved changes, choose Cancel to keep editing or Discard and continue to lose those edits.
5. Send a test to yourself
Choose Test to myself. The test goes to the signed-in account email shown in the editor, with [TEST] in the subject. It does not send the campaign to your selected audience.
Open the test in your inbox. Check the subject, preview text, images, button links, and footer on your phone as well as your computer. Fix anything unclear and save the campaign again. Test messages count toward your email allowance.
6. Review and send the campaign
Choose Review & send. Check the recipients, eligible count, sender details, subject, preview text, and business address. Read any skipped-address or delivery warnings.
The final button names the action and recipient count, such as Queue campaign to 25 people. Select it only when you are ready to send. Recipients are checked again before queueing, and delivery restrictions still apply before each delivery.
Once the campaign starts, its recipients are fixed. Later group changes do not add more people to that send. A queued email is waiting for processing; it is not proof that it reached an inbox.
7. Check delivery
Review Campaign status and use Refresh status for updated counts. Open Sent or View send history to inspect individual messages. Check the displayed status and any error for the specific recipient.
Common problems
- Save campaign is unavailable: check whether there are changes to save and read any validation error. Confirm that you have edit access.
- Review & send is unavailable: check the required inbox fields, recipient selection, invalid addresses, sender setup, and unresolved placeholders.
- A person is skipped: inspect the reason, such as an unsubscribe or delivery restriction. Adding the person again does not remove that restriction.
- The campaign is queued: refresh its status and inspect Sent. Do not start a second campaign just because delivery has not completed yet.
Finished: the campaign reopens with the saved audience, your test looks correct, and the submitted campaign has a delivery record you can inspect.