
How to set up bookings on your website
Set up a service customers can book, add the people and spaces it needs, and put the booking form on your website.
This guide uses a 30-minute consultation as its example. You will finish with a saved booking type, a website form, and a way to review incoming bookings. It also covers rooms, overnight stays, and calendar connections.
Bookings is included on Starter, Growth, Scale and Enterprise. Google Calendar and calendar links (iCal) are available. Outlook connections are not available for new setup yet.
Before you start
Open Customers → Bookings in your site workspace. Use a Starter plan or above to set up Booking.
Use a site admin account for business settings and shared-space setup. Editors can manage the booking work allowed by their role. People handling appointments must have joined the site through Team & access. Each person controls their own appointment hours and personal calendar account.
You can start with your booking hours alone. Google Calendar and live iCal links are optional.
1. Set up your availability
On your first visit, choose Start setup. A site admin completes Business settings. Check the suggested Business time zone and the required Notification email, then choose Save and continue.
The time zone starts with your device's zone when one is available. Search by city, region or UTC offset to choose another. The list shows current offsets, including half-hour and quarter-hour zones. Frontpage keeps the named time zone so daylight saving changes apply automatically. The notification email starts with the admin's account email; change it if booking requests and updates should go elsewhere.
In Your hours, select the days and times customers can book with you. Add a second time range for a break. The weekday shortcut fills the draft; check it before choosing Save hours and continue. Each joined member completes their own hours, including viewers. A person's first save needs at least one time range. They can later close all their hours in Settings → My appointment hours.
Connect calendar is optional. Connect Google Calendar or a live iCal link, or choose Continue or Skip for now to proceed without one. Both buttons open Review. Google sign-in still needs a calendar selection before that calendar checks availability. A failed or cancelled connection keeps your saved hours.
Check Review, then choose Finish setup to turn on Booking and open Calendar. Later members start with their own hours rather than repeating business settings. If an editor opens Booking before business setup, an admin needs to finish that step first.
Use Settings for advance notice, how far ahead customers can book, the change or cancellation cutoff, and the owner approval deadline. For example, 24 hours of advance notice prevents a customer from booking a consultation that starts in an hour. Finishing initial admin setup turns on Booking. Later members setting their hours or reconnecting calendars do not change that setting. You can pause Booking in Settings when needed.
2. Add a room, property, or location
If the consultation needs a room, choose Spaces → Add space. Enter its name, location, and a short description. A space is a place you reserve, not another user account.
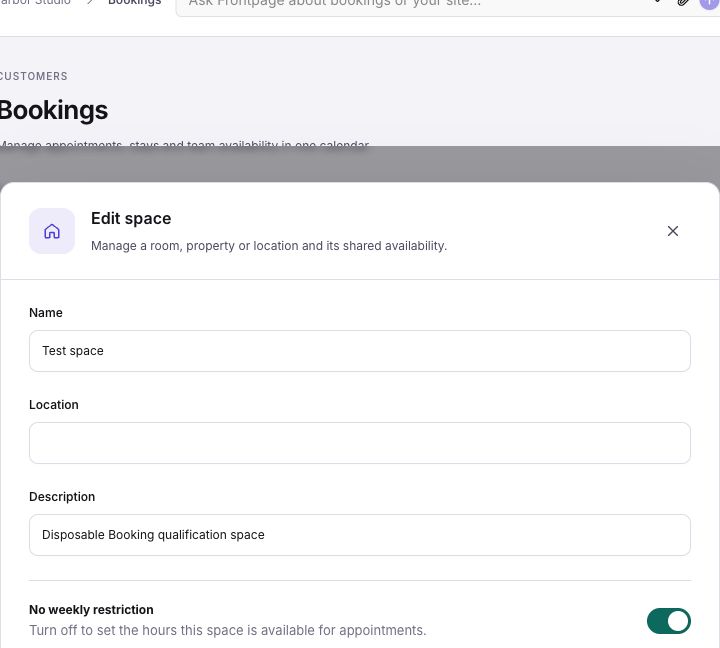
Keep No weekly restriction on if the space has no separate weekly hours. Turn it off to set when that space is available for appointments. Check Available for new bookings and save.
Skip this step for an appointment that does not need a physical space. For a stay, add the property or room that guests will reserve. Add cleaning days, closures, and other exceptions later on Calendar.
3. Create a booking type
Choose Booking types → New booking type. Name this example Project consultation and add a short description of what the customer will get.
- Under What can customers book?, choose Appointment · date and time.
- Set Appointment length (minutes) to 30. Under Bookings can start, keep the automatic option to match that length, or choose a start interval. A one-hour appointment can start every half hour if you select that interval.
- Add time before or after the appointment for preparation, cleanup, or travel if needed.
- Choose the joined site members who handle this booking. Each person needs saved appointment hours. Choose eligible spaces if the appointment needs a room too.
- Under How are bookings confirmed?, choose Require approval for each booking for this example. Choose Confirm automatically when you want successful requests confirmed without owner review.
- Add an address or meeting link if needed. It is a link you supply; Bookings does not automatically create a video meeting.
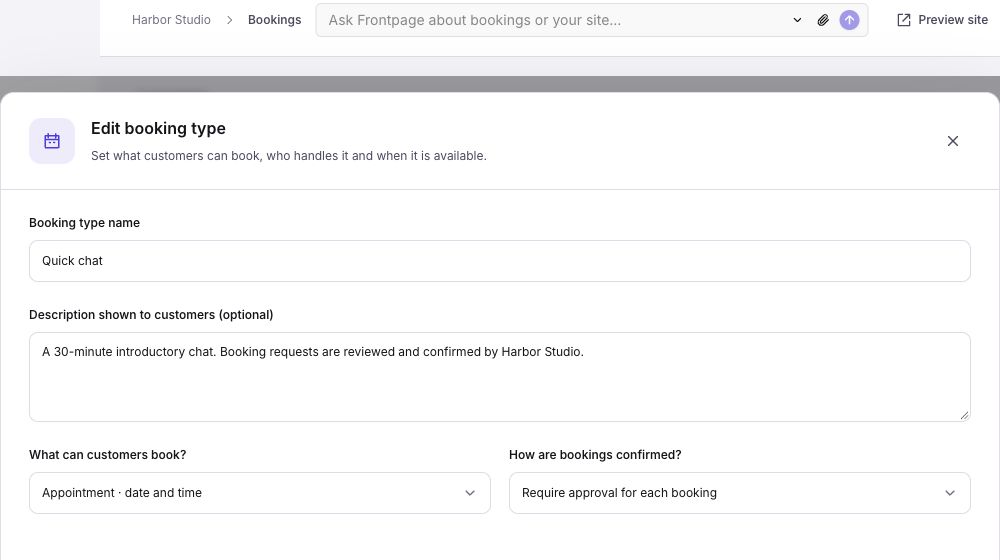
In Customer form, full name and email are required. Use Add question, Add phone, or Add address for the information you need. For a consultation, “What would you like help with?” is enough to start. Mark a question required only when you need the answer to handle the booking.
Turn on Allow customers to book this online and select Save booking type. This saves the type. It does not add a form to your website or publish a website change.
For overnight stays
Choose Stay · arrival and departure instead. Set the shortest and longest stay in nights, the check-in and checkout times, the confirmation policy, and the eligible spaces. A guest cottage might allow two to fourteen nights, check-in at 3 PM, and checkout at 11 AM. Appointment length and start intervals do not apply to stays.
4. Connect a calendar (optional)
Open Connections. You can use native booking hours without an outside calendar. Choose Google Calendar or Calendar link. Outlook setup is not available yet.
One free time.
Your member and space are both available.
Wednesday · 11:00 AMGoogle Calendar
- Select Connect beside Google Calendar. Sign in to your Google account and review the access request.
- Frontpage returns you to the step where you started. Choose the Google calendar it should check for busy times. Frontpage suggests your primary calendar when one is available and uses its name automatically.
- Choose Person for your appointment availability. A site admin can choose Room, space or location and select the spaces that use this calendar.
- Leave Add confirmed bookings to Google Calendar on to send confirmed bookings to the named Google calendar. Turn it off to check busy times only. Read-only calendars cannot receive bookings.
- Select Save calendar and wait for the first sync to finish. During onboarding, choose Continue when you are ready to review.
Other team members connect their own accounts. Connecting an account alone does not finish setup: select and save the calendar that should check availability. Frontpage sends confirmed bookings to a chosen writable destination; pending approval requests stay in Frontpage.
Use Change to select a different Google calendar or change its assignment. Disconnect calendar stops using that calendar; other connected calendars and your Frontpage bookings stay in place. A temporary loading failure offers Retry calendars. If Google access has expired or been revoked, Frontpage asks you to sign in again.
Wait for the connection to finish syncing and check its status. Busy times affect availability, but other members cannot open private event titles, descriptions, or attendees. Outside updates are not instant. If a required calendar needs attention, resolve that before relying on its available times.
Calendar links
Connect calendar link accepts a supported private iCal export link. Give it a calendar name, choose Person or Room, space or location, select who or which spaces it applies to, and save. This imports busy time only. It does not write Frontpage bookings to the other service and cannot guarantee instant conflict prevention across booking platforms. Keep the export link private.
5. Add your booking form to the website
Ask the Frontpage Agent to use the saved type. For example:
“Add Project consultation to my contact page. Let customers choose an available time and ask what they need help with. Match the rest of the site.”
Review the website preview. Booking turns on when the admin finishes initial setup. If you paused it later, turn on Accept online bookings in Settings before testing. Check that the type is available online, the assigned member or space is available, and the form shows the correct time zone.
For an appointment, customers see available dates and choose a time. For a stay, they choose check-in, then checkout; the calendar highlights the whole range and prevents a stay crossing unavailable nights. The default begins with an available date rather than asking visitors to guess. While availability loads, the calendar shows that it is checking rather than calling every date unavailable.
Customers enter their details, select Review booking, and check the summary in a dialog. They request a six-digit email code, enter it and submit in the same dialog. It uses a compact window on desktop and the full screen on mobile. Closing it or going Back keeps their answers. This email check is required. Requesting a code does not hold time. Frontpage checks availability again before saving the booking. The final card clearly says whether the booking is confirmed or waiting for approval.
Ask the agent to match the whole flow to your website: the calendar, questions, review, email check, result and management page. The default design is a starting point. You can ask for different colors, layout or a different calendar design without changing the booking rules.
Test with your own details before inviting customers. Check the booking in the workspace, then cancel the test booking so it does not hold a real slot. Publish the website when the page is ready. Saving a booking type or its hours does not publish a website edit.
6. Review and manage bookings
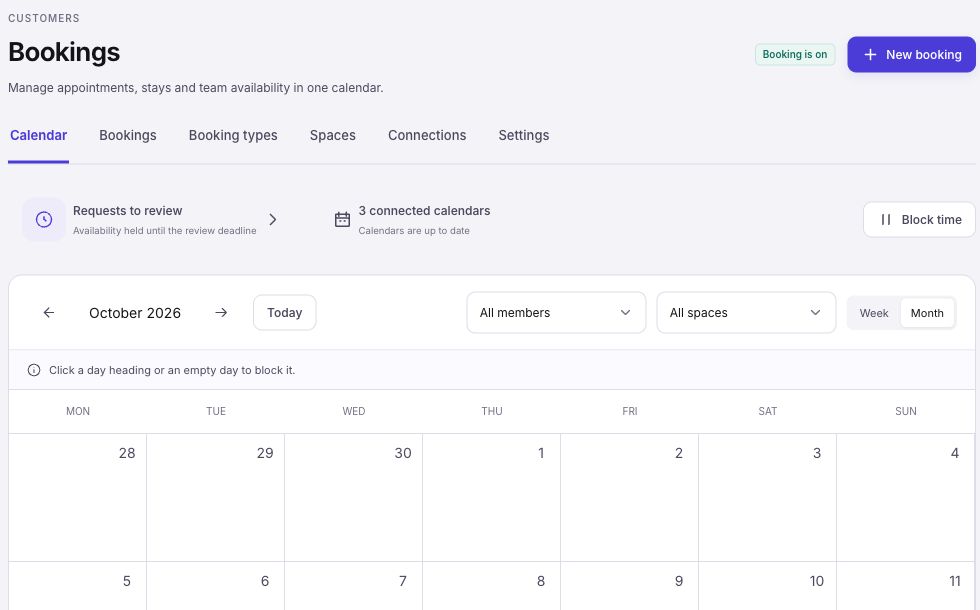
Open Calendar or Activity, then open the booking. Check the exact dates, customer answers, and assigned people or spaces. For an approval request, accept or decline it before its hold expires.
Activity shows each booking once, with the latest booking changes first. A request, cancellation or date change moves the same booking up the list. Status shows its current state. Last activity shows the latest action and when it happened. Reading a booking, calendar sync and email retries do not move it.
The N to review badge counts active new booking requests awaiting approval across the site. Opening a request does not clear it. Acceptance, decline, cancellation or expiry does. It excludes date-change requests and delivery or calendar problems. Search and status filters do not change the badge, and it disappears at zero.
Dates use the booking's business time zone. A same-day booking shows its date once, for example Nov 10, 2026, 9:00 AM – 9:30 AM. A booking that spans days shows both dates.
To stop new reservations for a time, select Block time, click or drag a calendar range, or click a day heading for a full day. Set a repeat pattern for regular closures. A new block does not cancel an existing booking; open that booking separately if it needs to change.
Customers use Manage booking in their receipt email to reopen the reservation and see the actions their booking allows. A pending request is not a confirmed stay. The business notification opens the signed-in workspace instead. If you test using the same address for the customer and business notifications, you receive both messages; business subjects say Business notification.
Common problems
- No available times: check the business time zone and hours, member hours, space availability, advance notice, published type, online-booking switch, buffers, existing bookings, and calendar connection status.
- Outlook is missing: Outlook setup is not available yet. Use Google Calendar, a calendar link, or your booking hours.
- The account says connected, but busy time is missing: choose and save an actual calendar, check its member or space assignment, and let the first sync finish.
- A request did not confirm: check its approval policy and deadline. An approval request stays pending until accepted and can expire.
- A booking did not collect payment: Bookings does not take deposits or payment. Payments is separate and does not itself confirm a reservation.
Check your result: the published page offers the right booking type, the customer gets a clear pending or confirmed message, and the booking appears in your workspace at the expected time.